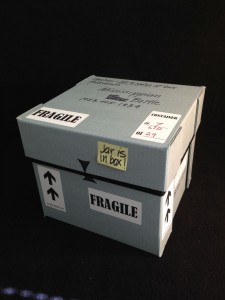
 Let’s say you buy a widget that comes in a box. This protective container might have on it colorful pictures of what is inside, instructions for setup and use, and barcodes by which the manufacturer, the shipper and the store keep track of inventory and price. Once the box’s usefulness is over, you flatten it and send it to the recyclers.
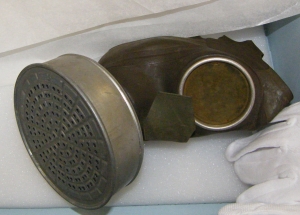
Think ahead, say, fifty years. You give the widget that was in the box to a museum. What does the museum do? Put it in a box. This box serves purposes very similar to the original one, and sometimes even has the ubiquitous barcode on it. There are important differences, however, between the original packaging and the new housing. The old box might have served as short-term physical protection to save the widget from damage during shipping and storage, but it was almost certainly made of materials that would have done long-term damage to the poor widget. Acidic paper and cardboard, foam that offgasses harmful chemicals, perhaps plastics that deteriorate and form sticky films that mar the finish. Adhesives that break down and migrate from tapes and seams onto the contents.
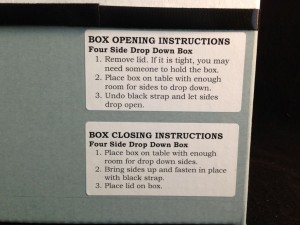 The new box is made of specially manufactured acid-free cardboard, buffered against acid migration. It is made without adhesives. Internal trays or supports may be made of inert foams, undyed and unprocessed cotton or polyester fabrics or fibers, or crumpled acid-free tissue paper. The box is labeled with the widget’s number and description, sometimes even a digital photograph of the it so you don’t have to open the box to see what’s inside. If necessary, instructions for opening up the box and taking the widget out safely are included.
 Many objects in the museum’s collection are able simply to sit on shelves or in drawers, and a great many others are put into commercially available acid-free boxes with minimal padding or support. Some items, though, are too fragile, or odd-shaped, to fit in ready-made housing. That’s where the box-maker comes in. I use simple tools – a knife and cutting mat and a glue gun. My arsenal of materials includes acid-free cardboard and card stock, foam in sheets and blocks and rods, archival double-sided tape, muslin and cotton tying tape, as well as the acid-free tissue.
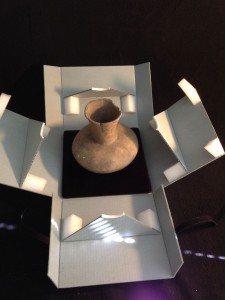 Laying out a box involves measuring the object and figuring out the best way for it to sit, working out how much extra space to include for padding and supports, and figuring out how to get it into and out of the box with the least amount of handling. Sometimes the item is nestled into a cushion of polyester fiberfill, sometimes it is tied to its supports, sometimes it is blocked in with removable foam blocks, complete with numbers and instructions. How do you figure out what to use? Experience, and for me, an ability to imagine myself as the object, able to detect any stresses or weak points that need to be taken care of.
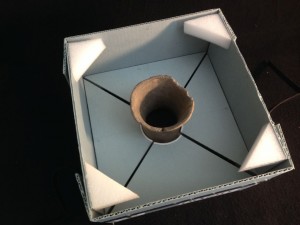
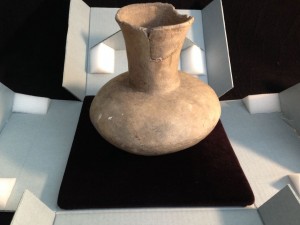
The box illustrated here is of the type known as a lotus box. It has four drop-down sides, allowing the Native American jar to be seen without lifting it out. The lid holds the sides together when the box is closed up. I am currently involved in designing a similar type of box for an artifact belonging to the Levine Museum. It will have a tray and only one drop-down side, with internal foam blocks that will allow two objects to travel safely one inside the other. I have also been asked to teach a box-making workshop this summer for the North Carolina Preservation Consortium.
 Containers have fascinated me since I was a kid. I always have saved boxes and tins and bottles. I used to sit in geometry class and design tiny fold-up boxes on my graph paper. Graduating to designing housing for museum objects was a very natural progression, and this is still my favorite part of the job of Collections Manager.
 Okay, I have a vision flashing in front of my eyes as I go through the database cropping photographs and renaming artifacts. Like the toasting fork that had been catalogued as a Pan, Roasting. My vision is of the future of the ungainly, poorly bound green book that tells me what I am and am not allowed to call these objects. Some of these things are difficult for a child of the mid twentieth century to identify. So I am seeing a future digital version of Nomenclature, and if you are willing to fork out the extra bucks, you get a version like Leafsnap where you photograph the item on your portable device and show it to the Nomenclature 17.2 program and it says, aha! And you say eureka! Because the device tells you what to call the item. How cool is that?


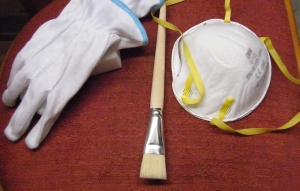 So we bring all this into the house and lug it up those oh-so-narrow stairs with that railing that is specially designed to catch and hold vacuum-cleaner hoses, and we put everything down. The only trouble is, there isn’t any place to put it down. Except the floor or the windowsills. Can’t put your dusting brush on the dresser, can’t lay your vacuum attachments on the trunk, can’t sit on any of the chairs when you get tired. Ever tried putting together a vacuum cleaner while wearing gloves? Ever tried vacuuming in a house that has exactly two outlets? Ever tried vacuuming in a house where you can’t touch the furniture with any part of the vacuum or with your bare hands? Where you have to vacuum with the grain of the floorboards instead of across? Where, to get behind or under a large piece of furniture, you have to have two people wearing gloves lift it up to move it so you don’t scar the floorboards?