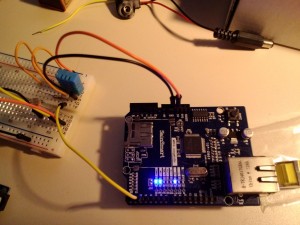
One day a colleague showed me a little blue thing that was blinking frantically.
“What’s that?” I asked.
“An Arduino”, he replied.
“What’s an Arduino?”
“It’s an amazing little thing! It’s a thing that can do things. It can do everything!”
Basically, when he showed it to me all it could do was blink a little red LED. But as I was digging deeper I discovered that there is a whole community of makers out there who do amazing projects with that little thing. You can really do everything, from reading sensor data to steering an electric motor and everything in between. When I saw that someone had realized a game of Tetris inside of a pumpkin (https://www.youtube.com/watch?v=8PCp5xk-9Qo) I was sold. I needed such a thing.

Actually, if you look sharp at the picture on the post for our second Registrar Trek Birthday 2015 you get the idea when I first made contact with this thing…
How about an alarm when it’s much too bright in a gallery and someone should close those curtains? Or a data logger that writes temperature and humidity in your off-site storage to a SD card? If there is LAN or even WiFi available, it’s starting to get really interesting as you can monitor the climate via the internet and even get alerts on twitter or in your mail when someone turns on the light or a climate value exceeds a certain level.
The big advantage of the arduino is that you can do those projects yourself and at a reasonable price. It requires that you familiarize with the topic, but, compared to former times, you don’t have to be an expert in electronics to do it. The few necessary components are available via the internet and thanks to a large, world-wide community that is committed to the spirit of Open Source you find a solution or even complete code to nearly every problem which you can adapt to your own situation with a little thinking and a few changes.

The first thing that can do things that actually DOES things for the TECHNOSEUM: A data logger that records the climate in a certain area of our museum.
For a start I suggest the starter kits who contain not only an arduino but a whole bunch of useful accessories like resistors, sensors and LEDs so you can experiment right there and then. There’s nothing more frustrating than missing one little component when you start learning and who has a fully equipped electronics workshop at home? Usually those kits come with some instructions for simple experiments (if they don’t, you can find plenty of them on youtube) that I highly recommend to conduct. Along with a general understanding of the topic you explore what can be done, may it be a tetris in a pumpkin or a data logger.
And there is one thing I can promise: when you manage that a little red LED is blinking exactly how you planned it for the first time, you get a feeling like you just discovered new territory…
This post is also available in Russian translated by Helena Tomashevskaya.

Any thought of posting instructions for the do-dads that you make? I have an Arduino user in-house (one of my kids) and if I was able to just hand him instructions and a bribe (most likely more parts or coffee!) he’d probably make them for me.
I can also see this as a great source of projects for a teen group at a museum or maybe the local library.
Oh the possibilities!
Yep, next up will be a step-by-step guide for a logger that logs to SD card. Hope your in-house expert will approve – although I’m pretty sure it’s too simple for him. 🙂
Fantastic!
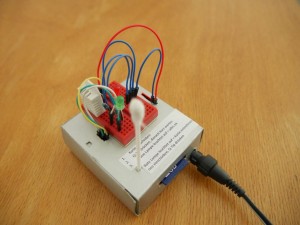
Is that really a q-tip (cotton swab) sticking up out of the little gadget you made? My dad would have been all over the Arduino. If he were still here among us, there would have been blinking lights all over the house, in the car, who knows, fastened to the cats. Sounds like great fun.
Oh no, it’s a very special, cozy restart-device! No, actually it’s a q-tip. This logger was an urgent call from our conservators in need of a logger and when I made a case for it I realized that it was impossible to reach the restart button inside without having to take the whole thing apart. I first drilled a hole in the case so you could restart it with a pencil (remember the old days, when this was the way you could restart a PC?). Re-considering that you probably don’t have a pencil at hand when you need it the most I searched for some replacement for the pencil and the first thing I found was a q-tip. I glued a small plactic piece on the other side of the q-tip so it hits the button reliably. In addition I think “just hit the q-tip for restart” is a great thing to read in a user’s manual. 😉